

Dolby atmos stems
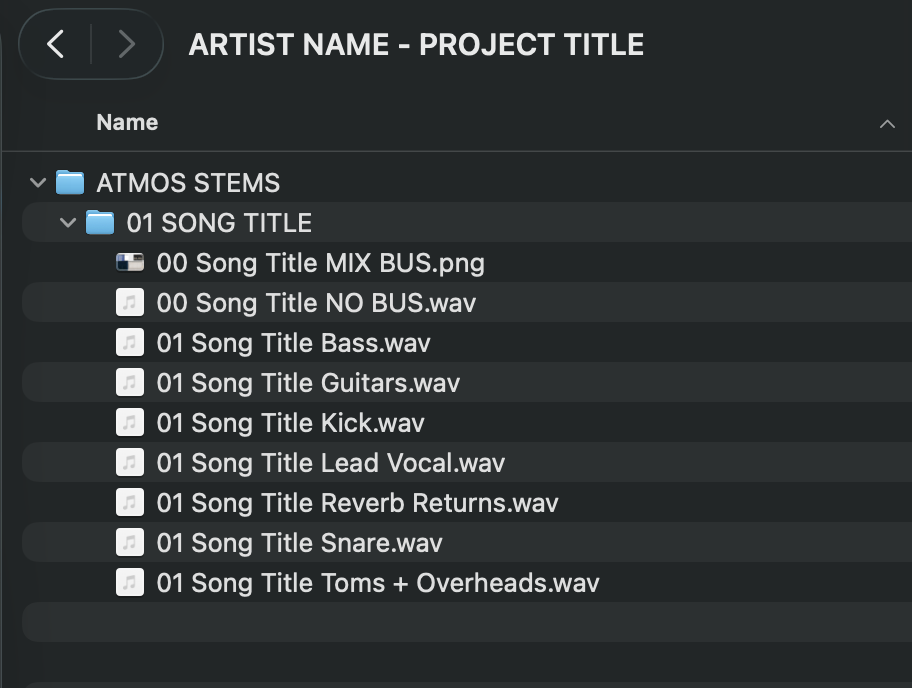
A properly-organized and labeled Atmos stem delivery package.
Dolby Atmos is the standard for immersive or spatial audio (ALL...AROUND…YOU).
If you already have an Atmos mix, send me the ADM BWF and I can create the Atmos master.
If you do not have an Atmos mix already, I need either mix stems or a wet multitrack from the project’s mix engineer.
I'll build the Atmos mix from stems or a wet multitrack of the approved stereo mix so that it sits perfectly alongside the approved stereo master.
Please print your stems from the same mix revision we mastered. The goal is a set of stems that sums to that mix exactly.
Print all processing that is critical to your sound. Plugins on tracks and groups, automation, panning, and sidechaining can all remain engaged.
Turn off compression, saturation, clipping, and limiting on the mix bus. Send me a screenshot of what was there. (Yes, this is the opposite of the stereo mix prep advice. Mix bus processing reacts to the whole mix, so stems printed through it will not sum together the same way as the full mix. Using the screenshot of the mix bus processing, the same character will be recreated in the Atmos mix.) A clean, static EQ can stay on.
Send reverbs and delays as their own stems: the vocal reverb, snare room, delay throws, etc. In Atmos, effects can be placed separately from sources. Once they’re baked into a stem, I can’t separate them cleanly.
Send the lead vocal twice. One dry, with its EQ and compression, but no reverb or delay and one wet, exactly as it sits in the mix. The wet version is the reference point for feeling while the dry is what we will actually place.
Print centered mono sources as mono files (typically kick, snare, bass, and lead vocal) and everything else as stereo.
Keep compressed groups together. If parts share a compressed bus (like a drum bus), print that bus as one stem. However if you know the trick, you can instead key the bus compressor from the full bus while printing each part.
Export WAV files at 24-bit or 32-bit float at your session’s sample rate. Every stem must start and end at the same point, even if the part doesn’t come in until the bridge (print the silence too). No normalization and ensure that all peaks remain under 0.0 dBFS.
Audition before sending stems. Drop every stem into an empty session at the same starting point and play them at unity gain (all faders at 0). It should sound exactly like your mix, minus the bus processing. If something is missing, late, or doubled, you should hear it immediately. Include a print of your full mix with the mixbus processing off, labeled NO BUS. The stems should null against that print.
A good starting point for stems: 1) Kick · 2) Snare · 3) Toms · 4) Overheads · 5) Room Mics · 6) Percussion · 7) Bass · 8) Sub/808 · 9) Guitars · 10) Keys · 11) Synths · 12) Lead Vocal (Dry + Wet) · 13) Backing Vocals · 14) Vocal FX · 15) Reverb Returns · 16) Delay Returns · 17) FX.
Split further where necessary and combine stems where spatial separation is less relevant.
A perfect screenshot of mixbus processing: all plugins and parameters visible and the chain order displayed clearly.